PC hardware issues vary and can occur at any time, and graphics cards are no different. Knowing the signs of a faulty graphics card can save you a lot of time and stress and it’s quite likely you may be able to fix the problem before it’s too late. Check out our handy guide "Graphics Card Troubleshooting".
VR NewsPC hardware issues vary and can occur at any time, and graphics cards are no different. Knowing the signs of a faulty graphics card can save you a lot of time and stress and it’s quite likely you may be able to fix the problem before it’s too late. Check out our handy guide "Graphics Card Troubleshooting".

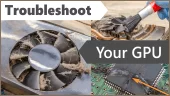
If your graphics card is playing-up you may want to perform some checks before you go shelling out hundreds of pounds on a new one. We’ve laid out some handy tips for troubleshooting common GPU problems and hope they'll help you reach a conclusion as to whether it's time to replace it.

PC hardware issues vary and can occur at any time, and graphics cards are no different. Knowing the signs of a faulty graphics card can save you a lot of time and stress and it’s quite likely you may be able to fix the problem before it’s too late.
It’s recommended you follow this article from start to finish, certainly if you’re serious about fixing the issue rather than buying a new graphics card.
There are a few things you can do to check and determine if your graphics card has minor issues or whether it’s completely broke - so don’t go buying a new one just yet. A graphics card can be an expensive piece of hardware, especially ones that are capable of providing high-quality visuals and VR experiences. Just because you find your GPU struggling, it doesn’t necessarily mean that it’s completely broken and unfixable. We recommend that you try and fix it before you commit to buying a new one, as with any expensive piece of hardware.
(1) Swap out displays: On rare occasions monitors can fail, so it’s always a good idea to check the monitor is working correctly, as it may not have anything whatsoever to do with your graphics card. If you feel the monitor is suspect, connect a different monitor to see if you experience the same problems.
(2) Update Graphics Card Drivers: It’s recommended you uninstall your old graphics card drivers and install the latest, recommended drivers from the GPU manufacturer. Here's some helpful links to download the latest Drivers; NVIDIA GEFORCE Drivers or AMD Drivers or AMD Auto-Detect, which detects various AMD hardware and installs the necessary drivers automatically.
If you are unsure which graphics card model you have, there’s usually a universal option ‘Download Now’ which includes all the Drivers in one executable file and when installed will automatically detect and choose the most suitable Driver for your graphics card. An uninstall of previous GPU drivers is only really necessary if you’ve changed your GPU.
(3) Overclocked: If you overclocked your graphics card, it’s time to put it back to its factory state. To be honest I wouldn't recommend overclocking anything. For the little extra you get and the problems it can cause, it’s just not worth the hassle. The same goes for the RAM and CPU. I’m not suggesting you remove overclocking altogether, it’s just part of the troubleshooting process in order to determine and rule-out any potential issues.

(4) Motherboard: Ensure you have the latest motherboard chipset drivers and Bios update. If you’re a novice with computers and not au fait on the tech-side of things, you may find this difficult, especially when it comes to updating the Bios. It’s not entirely necessary, but on occasion manufactures will update their Drivers and Bios to accommodate new types of hardware, such as the latest CPUs and GPUs. The Motherboard manufacturer usually provides plenty of information as to what the update is for and a guide on how to install it. You can leave this step to last if all else fails.
Always go through the motions of checking these basic, yet common problems associated with computer components. Shut down your PC in the normal manner and turn the power source off (usually the power socket on the wall), but keep it plugged in, as the power lead will act as an earth. Once off, your graphics card and other computer components have the chance to cool down, removing the side panel will speed up the process. After about 15 to 20 minutes, start with a visual inspection, firstly by checking for the build-up of dust. Dust is often the main cause of overheating and can affect almost any piece of hardware. Dust acts as an insulator and retains heat, something you don’t want in any computer.

Computer dust is extremely fine and will literally cling to any hardware component, almost appearing to stick to every nook and cranny - even a vacuuming using a small head attachment will have little or no effect in sucking up dust. The safest and most efficient way of removing dust is with a can of compressed air. The straw like nozzle attachment accompanied with the air can is ideal for getting into all those hard to reach areas. Place the vacuum cleaner nearby, securing the flexi-pipe end to the chassis of the computer case using a cable tie, a piece of string or some duck tape, as you don’t want the pipe getting in the way, or worse, falling inside the computer case and damaging vital internal components.


IMPORTANT: Do not use air from an industrial compressor. Powerful air directed at fan blades will cause them to spin at higher rates than normal and can damage the bearings that house the fan blades. If the bearings get damaged in any way the fan may stop working altogether, or make a loud noise when powered back on.
Computer dust is extremely fine and hazardous to your health, so ensure you’re wearing a suitable dust mask. Turn on the vacuum cleaner while you blow out unwanted dust using the compressed air. Blast away as much dust as possible from every component including the power supply, paying particular attention to the CPU fan, its cooling gills and surrounding area. A small artist's brush and toothpicks can also help to loosen and clear those areas where dust has accumulated. The same applies to the Graphics Card (GPU).

The GPU can be taken out and air-blasted if you find that there’s not enough space to work in. Be careful when removing the graphics card - first remove the support screw that fixes the card to the chassis, then push the retaining clip (coloured plastic clip) to detach it from the motherboard. If you’re careful you can remove the cover that protects the GPUs internal components, but be careful not to damage anything. When the card has had a good brush and blow-out, make sure it’s reinserted into the PCie slot correctly - clipping it back in place, and screwing it back to the chassis - and that all the relevant cables are securely plugged back in.
The next step is to blow out all the open ports, such as USB, the game and HDMI ports.

Now that everything is clean and dust free, it’s time for the third step, checking for heat damage. A small high-powered LED torch is highly recommended for a proper, close-up inspection, normal room lighting won’t be adequate enough to see everything clearly. Check each piece of hardware, such as the motherboard and graphics card for signs of overheating. Anything suspect will usually look brownish in colour or appear stained. It doesn’t necessarily mean that the component has failed, it may simply indicate that it’s been heating up more than it should. There could be many reasons for this, but commonly there may have been a recent build-up of dust in that area or the computer case doesn’t have a sufficient amount of cooling fans.

Before the side panel is put back on the computer case, check that the wiring is all neat and tidy and there’s nothing in the way of fans. Double check everything is seated correctly, such as the graphics card and RAM. With the side panel still off, turn the power back on and turn on the computer. As the computer springs to life, check and make sure all the fans are working - especially the graphics card fan(s). If you hear any beeping sounds ‘POST’ (power-on self-test) that you are unfamiliar with, power down the computer and double check everything is firmly seated. If you’re still getting computer POST beep codes, do an internet search to find out what they mean.
If you’re still having issues with your graphics card - perform a search in the lower left search box in Windows. Type Device Manager and hit return. Click on ‘Display adapters’ then double click on the name of your graphics card and look for the information under "Device status." It will typically show, "This device is working properly." If it doesn’t say this, take a note of whatever warning or error is shown and seek help. There’s usually someone, somewhere on the internet that will have the answer.
Finally, If after exhausting all efforts and you are still having problems and you haven’t updated your Motherboard Drivers or Bios, now's the time to do it. At least your PC has had a good service. If you require a new graphics card, check out our guide on the best graphics cards.
On a final note; You also may be interested to know that Nvidia launched the new 3000 series graphics card (Ampere GPU) - The NVIDIA RTX 3080 and RTX 3090, with the 3060 and 3070 to follow soon. AMD also have new cards in the pipeline with the forthcoming lineup of RDNA2 (Big-Navi). So hopefully the competition will level-out the price. More information on the Nvidia Ampere GPU.
Do you have any tips on servicing a computer? Let us know about them in the comments box below.


VrOne.co.uk is a participant in the Amazon Services LLC Associates Program, an affiliate advertising program designed to provide a means for sites to earn advertising fees by advertising and linking to Amazon.com, Amazon.co.uk, Amazon.it, Amazon.de and other Amazon stores worldwide.


